Saturday 24 November 2012

Parsnip, Maple Syrup and Pear Cake


Well, this month is the first birthday of the Tea Time Treats challenge, hosted by Karen of Lavender and Lovage and Kate of What Kate Baked. So to celebrate, Karen is hosting this month with the theme of Cake. What could be more appropriate for a birthday celebration than cake? I knew when she announced it exactly which cake I was going to make... 


A few years ago BBC Good Food magazine was celebrating its 20th birthday and ran a competition to create a recipe for a suitably celebratory cake. There were lots of entries and the winners and runners up in various categories were chosen (and all look delicious). This Parsnip and Maple Syrup Cake was in the magazine (November 2009) as a finalist but ended up as the winner, and deservedly so. The other two finalist's cakes were a Coffee Crunch Cake and a Salted Caramel Chocolate Cake. Yum!

I've actually made this cake before, a couple of years ago and never got round to blogging it, so this was a great excuse to make it again and remind myself of just how delicious it really is. My colleagues are generally open minded when it comes to trying the various different cakes that land on the tea-room table (they don't get a say - I bake what I want and they can choose to eat it if they want, or ignore it if they want) but I did wonder whether they would draw the line at parsnip in a cake. So it went on the tea-room table as 'Mystery Cake - can you guess the ingredients?'. It was good fun - all through the day I had people coming up to me with random suggestions of what was in the cake - some correct answers and some slightly wild suggestions which amused me greatly. 


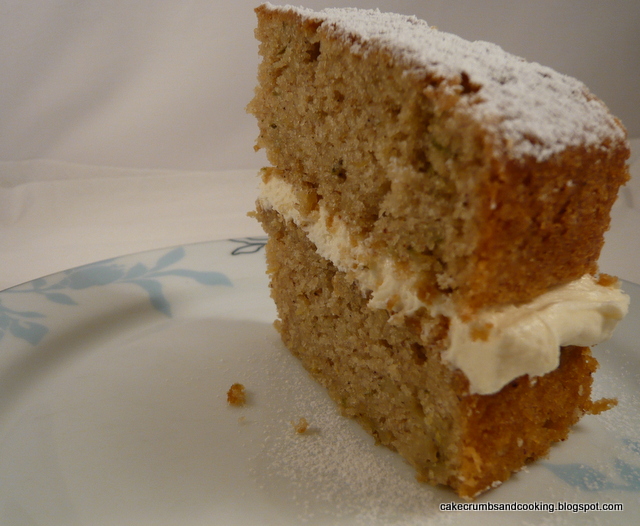
I did change the recipe slightly. I can't use pecans so I omitted those, I used a small pear rather than an eating apple and I omitted the zest and juice of the orange specified. I'm struggling to remember whether I replaced it with lemon, but I don't think I did. This is a cake that is more than the sum of its parts - perfectly balanced in flavours. There isn't a parsnip taste at all (in the same way that carrot cake doesn't taste of carrot) but oddly, there isn't a maple syrup flavour either. Quite a bit of syrup is used in the cake, and I'm sure that it contributes to the overall effect but it is the one ingredient that none of my colleagues picked up (quite a few said cinnamon - which is in the mixed spice) and a number suggested citrus - lemon or lime (which I don't think I used) but perhaps they were foxed by the strips of grated pear skin which was green and after suggesting various vegetables (the texture gives it away) some people said parsnip. I used a vanilla buttercream for the centre of the cake (50g butter, about 150g icing sugar and a tsp vanilla extract, made in the usual way). The texture of the cake is outstanding though - really moist and quite close, yet light too. I think this is quite a common feature of vegetable cakes - the moistness but without accompanying heaviness. The cakes are quite delicate when baked, so be careful when turning them out.


Great minds think alike though, as Suelle at Mainly Baking has already blogged this cake as her entry to TTT. However, because I think it's such a lovely cake and definitely deserves to be promoted and made by more people I'm blogging it as my entry too. So I guess I could sum up this entire post in one short sentence: Make and eat this cake, you won't regret it!


Tuesday 20 November 2012

White Chocolate Chocolate Cookies


These are the result of me picking up the Waitrose recipe cards instore on a recent shopping trip. Yes, I could do my shopping online, but then I'd miss out on this kind of thing. Some might say this would be good for both my bank balance and waistline and I'd be inclined to agree on both counts, but then my life is more fun with cookies in it than without, so I'm prepared to make sacrifices...

This recipe was originally for Chocolate and Macadamia Cookies and is in association with Green and Black's. You can find the original recipe here, but as I can't have macadamia nuts I have adapted it slightly by adding more chocolate.


White Chocolate Chocolate Cookies
Ingredients
115g butter, softened
60g icing sugar
100g plain flour
20g Green and Black's Cocoa powder
1/2tsp vanilla extract
100g white chocolate, chopped (I didn't use G&B here)

Method
- Preheat the oven to 180C/Gas 4.
- Cream the butter and sugar together until pale. Add the flour and cocoa powder to the butter mixture and beat in with the vanilla extract.
- Stir in the chopped white chocolate.
- Roll the mixture into 16 walnut sized balls and place on two parchment lined baking sheets.
- Bake for about 12 minutes (the recipe specifies 15 but mine were overdone by then) but check at 10.
- Allow to cool on a wire rack, or devour whilst still warm and full of melty chocolate.

Tips: 
* Definitely don't leave them for 15 minutes. My first tray were definitely overdone and bordering on bitter and burnt which is such a pity (I ate them anyway...). The second batch, left in for less time, and with the door opened a couple of times to check on progress were much better.
* Green and Black's Cocoa is the way to go here - it's so much darker in colour than (for example) Cadbury's that although I have never actually dipped my finger into both of them to do a taste test comparison, I'm sure that the G&B has a better depth of flavour for this kind of recipe.


Slightly crumbly round the edges and softer and chewier in the middle I did enjoy these. They aren't a 'Millie's Cookie'/American Cookie style with a very chewy centre (I guess because this recipe is eggless) but they are delicious all the same and very quick and easy to make, bake and importantly, eat!

If you visit the Waitrose website you can find more than 5000 recipes - I think I am required to say this in order to be able to publish their recipe, but actually it's entirely not a problem because I really would recommend their website anyway - full of delicious recipes.

Friday 16 November 2012

Chocolate Sliders


I made sliders, based on Dan Lepard's recipe quite a long time ago now (in fact, just over a year... how time flies). They have been on my mind again recently. The lovely soft, moist texture was what appealed to me both then and now so I thought I'd make them again. This time however, I wanted to add my own twist - chocolate!

Soft and moist texture

Not for any particular reason, just because adding chocolate to things generally makes them better. I have been meaning to make a chocolate loaf (yeasted bread rather than cake) for many years now and thought that this recipe would lend itself well to the addition of chocolate. See below for my thoughts and musings after tasting them....

Before prooving

Chocolate Sliders
Ingredients
25g cornflour (cornstarch in the US)
275ml milk (I used semi-skimmed)
1tsp sugar (5g)
12g butter
50g cocoa powder
325g strong white bread flour
1 tsp salt
1 tsp dried (instant) yeast

Makes 14

I followed Dan's instructions for these again with minor modifications:
- Slake the cornflour with a little of the milk to form a smooth paste (slaking is just the term used to refer to the process of mixing a small amount of the liquid with the cornflour - it prevents lumps forming when the mixture is heated) and then add the rest of the milk, mixing until smooth. You will find that the mixture does not have any lumps in it because the lumps are removed before the majority of the milk is added. Heat until boiling, stirring all the time - the mixture will remain quite runny for ages and then suddenly thicken up. Remove from the heat at this point, stir in the sugar and butter and allow to cool a little.
- Add the flour, cocoa powder, salt and yeast and mix well to form a dough. I had to add a little water here as my dough was too dry to come together. Leave for 10 minutes or so, and then knead briefly until smooth. I then kneaded my dough again after about 20 minutes and then left it to increase in size.
- Leave until significantly increased in size. I didn't time this as I was busy with various other things, but I think it was left for longer than Dan's specified 90 minutes.
- I wanted mini slider size rolls so weighed out 50g pieces of dough (yes, using a scale to make sure they were all the same) and shaped them into balls. I placed these relatively close together on a lined baking tray and left them to rise again. I place them close together to get a slight 'batching' effect, where the edges of the buns met rather than staying separate.
- Preheat the oven to Gas 6/200C in sufficient time before you think you'll need it (yes, that's vague - your oven might take 30 minutes to heat up, it might take 5. Mine probably takes about 10 but it was on anyway). 
- Dust lightly with flour and then bake for 20-25 minutes. I have no idea how I decided when they were done - they went into the oven dark brown and came out dark brown.... The time is based on Dan's recommendations but with a little added to allow for using a lower temperature.

After prooving

Texture wise, these were perfect - just how I remember the sliders from last year. So soft and moist - almost cake like (in a bread-y sort of way). Taste-wise I have to confess to being slightly underwhelmed. I had remembered enjoying the sliders so much last year and thought that these would be just as good. Although I said at the beginning that adding chocolate to most things makes them better, the substitution of such a large proportion of the flour for cocoa powder actually ended up making a slightly bitter roll. Not inedibly bitter, but it took me by surprise. I think that adding chopped chocolate to the basic dough would have been a better way to add chocolate flavour to the sliders. Either that, or to add more sugar to the dough to counteract the bitterness.


However, nothing ventured, nothing gained and although the bitterness of the bread took me by surprise the first time I ate them, they have very much grown on me and I'm glad I tried the experiment. I have been eating them for breakfast (what?! bread is definitely a breakfast item, even if it is chocolate bread...) and although they aren't the best spread simply with butter I think they'd be divine with Nutella (for those who can). I can definitely recommend them with choccy Philly or spread with butter and a square of 70% chocolate (I used Lindt because a 10g square is just the right size for these rolls). I think the chocolate is quite a French thing - I am given to understand that a few squares of chocolate in a pain-de-mie (sweetish soft white bread) roll is a common snack for children in France (though I could be mistaken - they probably eat Mars Bars like the rest of the world!)

Choccy Philly - really not silly...


I am submitting these to We Should Cocoa this month, where the theme is 'Bread'. Founded by Choclette of Choc Log Blog and Chele of Chocolate Teapot, the host this month is Nazima of Franglais Kitchen.


I am also submitting them to Breakfast Club, founded by Helen of Fuss Free Flavours and hosted this month by Choclette of Choc Log Blog.

Tuesday 13 November 2012

Traditional Christmas Cake


Yes, it's the 'C' word - Christmas. I haven't even started to think about anything else related to Christmas other than the cake. This is simply because this cake needs to be made in advance to mature for Christmas and be at it's best. It does seem early, but just trust me on this!

This recipe is our family recipe for Christmas cakes, used by my mum since before I was born I think. It originally came from one of the booklets that my mum collected in the 1970's as part of the Cordon Bleu cookery course. There were quite a few of these booklets hanging around the house when I was younger, but my mum being the tidy person she is (and not a hoarder like me, I got that from my dad) chucked most of them out. However, the booklet with the Christmas Cake recipe was always earmarked to stay safe. The cake is made every year for varying numbers of family members - grandparents, aunties and uncles, cousins, nephews and nieces and is also make in mini tins (200g baked bean size, in case you were wondering...) for cake sales at church. Not a cheap cake sale cake, but my mum has requests for these every year from many members of the congregation and they are always massively popular. I think perhaps I'd better start saving my baked bean tins for her again...

There have been a number of minor amendments over the years and so I thought I would record my version of this cake here. As you will see, this is destined to be a Christmas gift (for my dad - I don't think he reads this blog, but if he does... Hi Dad!... then he'll be rather relieved that the cake is made and it's the right one this time) so there are no inside shots.


Last year I completely ran out of time and didn't make this cake, reasoning that I would be better to make a cake that was intended to be eaten soon after making. I found Delia's Last-Minute Sherry Mincemeat Cake and made that instead. It was a disaster. In fact, I was so ashamed of it that I wouldn't even let myself take a photograph of it. I used fruit and nuts for the topping as shown, but they all sank into the middle of the cake, the edges ballooned up and I was embarrassed that I would have to give such a monstrosity as a gift. But having run out of time, I gave it anyway. Hence the need to get ahead on this year's effort.

The year before last I used this same recipe but for some reason (and what with being nearly two years ago I really can't remember what times/temperatures etc I used) the fruit and nuts darkened far too much. I guess I must have misread my recipe. I'm happy to report a better outcome this year.

NB When baking the cake I noted that quite a bit of fat came out of the cake. I was using a lined loose-based tin and having spoken to my mum since making it, she says that this happens to her too, so she doesn't use a loose-based tin. It's up to you, but I'd recommend something under the cake tin to catch the escaping butter if necessary. Hopefully the cake won't be dry....

Traditional Christmas Cake
Ingredients
115g plain flour
pinch salt
1/4 nutmeg, grated
1/2 tsp mixed spice
225g sultanas
175g raisins
115g glace cherries, halved
85g slivered almonds (or blanched almonds, chopped lengthways)
85g butter
grated rind 1/2 lemon (or orange)
85g dark brown soft sugar
2 eggs
2 tbsp brandy/rum/sherry or 1 tbsp orange juice

To decorate
Your choice of nuts and fruits - I used brazil nuts, almonds and glace cherries, but my mum always includes walnuts. You could also use hazelnuts, or whatever takes your fancy.

Method
- Preheat the oven to 180C/Gas 4. Grease and line a 6"/15cm round, deep (it needs to be deep) tin with a double layer of parchment paper round the sides and on the base - this helps to protect the cake as it bakes.


Preparation stage (can be done the night before):

Put butter, sugar and zest into a large bowl. This needs to be large enough to hold all of the mixture towards the end of mixing.
Put flour, salt, spices into a small bowl.
Put all dried fruit into a medium bowl with the nuts and toss with a tbsp or so of flour.

- Cream the butter, sugar and grated zest until soft and light.
- Add the eggs one at a time, with a spoonful of flour after each to help prevent the mixture curdling.
- Fold in half of the flour.
- Fold in the fruit and nuts until well mixed and then add the remaining flour mixture and alcohol/fruit juice and continue to mix until all amalgamated.
- Smooth the top of the cake (if baking without nut decoration, smooth with wet fingers to protect the surface of the cake) and arrange the fruit and nuts as you wish. Our family have always gone for concentric circles.
- Bake for 45 minutes and then reduce the temperature to 160C/Gas 3 (or just under, Gas 3 is apparently 170C), cover the cake with a double thickness of parchment weighed down with an old wooden spoon (or a silicon one like I used) - this is just to protect the surface from over-browning. Continue to bake for a further 45 minutes - 1 hour. Test with a skewer/cake tester. If it comes out clean the cake is done. I ended up leaving mine in for two hours in total.


A note on decoration: The cake is perfectly suitable for making as a plain cake to be covered in marzipan and royal (more traditional) or fondant (newfangled) icing. However, in our family it is always, always covered with a fruit and nut topping. This dates back to the 1970's when there was a shortage of icing sugar and so royal icing couldn't be made. (Yes, I know this sounds odd, but it was 1974, the year of the 3 day week, and many things were in shortage, sugar included! There's an article here.)

To store: When completely cold, wrap the cake in greaseproof paper and over-wrap it with foil. Keep in a cool(ish) place (i.e. not next to a radiator...) until needed.

I don't actually know how long this cake keeps, but a good while if properly wrapped. One year, my mum (making the cakes in September...) was either super-organised and thought to make two for the household, or miscalculated how many relatives needed one and there ended up being two cakes. One was consumed over Christmas and into January and then the other one stayed on top of a tall cupboard, hidden with kitchen rolls or some such kitchen related item. It was eventually rescued in about July, cut into, pronounced 'mature' and 'rather delicious'. So I reckon it'll keep for a while.

Saturday 10 November 2012

Raymond Blanc's Lemon Cake


Well, almost. I remember watching this cake being made, and shortly after saw that Suelle had baked it and made a note of her observations on the recipe. For some reason this recipe popped rather randomly into my mind a few days ago. The combination of a couple of lemons, a pot of double cream and rather a lot of eggs to use meant that this recipe was the perfect solution.

You can find the recipe here on the BBC Food website. I made some small changes to the recipe to reflect my ingredient availability and Suelle's comments about the recipe.


I only used two lemons (that's all I had) and added the zest of both to the cake mixture, along with the juice of one of them. I missed out the rum (sorry Raymond, I don't have rum kicking around my house) and used salted butter (thereby missing out the pinch of salt). Actually, given how much I usually change recipes that's pretty good going for me! After reading Suelle's comments I decided to put the whole lot into the tin (which is very counterintuitive given how much batter there is) and all was well.

I also wanted to try a little trick I'd heard (not sure whether I heard it via twitter/in one of his books/on his blog) from Edd Kimber about getting the crack on a loaf cake. You put a little line of butter down the centre of the cake before putting it in the oven and then it melts and forms a weak point in the batter where a crack will form (my understanding of it). I wasn't sure if it'd work but thought it worth a go and I did indeed get a very attractive crack along the length of my loaf. A good tip, and one I'll be using again. Thanks Edd. I found my cake too longer to bake than the 50-60 minutes specified. Mine was more like 1hr 15-20 (I sort of lost track). I covered it up after about 55 minutes to stop it over-browning.


For the icing I decided not to go the apricot jam and glaze route, but just to revert to the kind of drizzle I know I like - I dissolved the 150g icing sugar in the juice of the remaining lemon, allowed it to boil over, creating sticky chaos on my hob (yeah, I don't really recommend that step) and then when the cake was baked, stabbed it all over with a long cake tester (the cake is too deep for a wooden cocktail stick, which is my usual cake-testing-implement-of-choice) and poured the syrup over. I left it until cold in the tin to absorb the syrup. Yum, sticky (actually - very, very sticky....)

This was such a good cake. I don't quite know how to describe it, because if I say it was dense, that doesn't sound complimentary and it's actually meant to. It was the perfect balance of denseness and solidity yet when eaten it was delicate and soft. My method of soaking the syrup into the cake worked as well as I had hoped and created delicious moist, lemony edges to the cake, and at the base of the cake there was a lovely moist bit too. I will certainly make this again the next time the correct ingredients align in my baking life.... I can't say that it was a cheap cake due to the number of eggs and the cream, but oh boy was it ever worth making. Next time I think I'll try and ramp up the lemon flavour by adding more zest, or perhaps a teaspoon of lemon extract (oil) and using more lemon juice in the glaze, to get that real lemon zing that was perhaps missing (as also noted by Suelle).


As I have been meaning to make this for ages and ages (and have merely been waiting for the correct constellation of ingredients-needing-to-be-used-up to occur) I am going to submit it to Bookmarked Recipes, hosted by Jac of Tinned Tomatoes. (Or I will if I can find the linky, I don't think it's up yet... Edited to add link 14/11/12)

Saturday 3 November 2012

Apple and Pear Parkin


It seems appropriately cold to be thinking about warming autumnal flavours and for me, that's ginger, mixed spice and treacle. I particularly love the traditional northern cake known as Parkin. I have made a couple of other versions in previous years - click to find my traditional parkin recipe and a recipe I used from Dan Lepard. Both of these are delicious, but as ever, tastes change and my fickle taste buds wanted something new and different. This year I was browsing a little magazine which I think came as part of Waitrose Kitchen - Waitrose's own cookery magazine. This was a little booklet focusing on autumn flavours and contained a recipe for a fruity parkin. I had never really thought to add fruit to a parkin before but then thought 'why not!'.


The recipe didn't quite appeal in the form it was in, so this is more of an 'inspired by' rather than an adaptation - I've changed quite a few bits of it! I can't see it on their website at the moment, but I have changed it quite considerably so give my version below.


Apple and Pear Parkin
Ingredients
65g butter
165g self raising flour
1 heaped tsp ground ginger
scant tsp bicarbonate of soda
65g medium oatmeal
1 small conference pear
1 small apple (I used an Egremont Russet)
100g black treacle
100g golden syrup
3 pieces stem ginger in syrup, chopped
75ml milk

Method
- Preheat the oven to 170C/Gas 3. Grease and line an 8"/20cm square tin.
- Mix together the flour, ginger, oatmeal and bicarbonate of soda in a bowl.
- Heat the butter, treacle, golden syrup and chopped ginger together in a pan until the butter has melted but the mixture isn't boiling.
- Remove from the heat and stir in the milk.
- Add to the flour mixture. I added a little at a time - this allows you to stir it in gradually and prevents lumps and pockets of flour forming.
- Pour into the prepared tin. Slice the apple and pear finely and lay on the top of the mixture, scattering in a random-ish fashion (I placed mine to get a good mixture of the different fruits across the top).
- Bake for about 45 minutes until the centre feels firm to the touch (I can't remember quite how long mine took).
- Serve warm as a dessert with icecream or creme fraiche or cold as a cake.


Normally, parkin benefits from having a few days for the treacle and golden syrup to draw in moisture and make the top sticky and moist - this is certainly the case for my traditional parkin recipe - it just carries on getting better and better. Here, however, the fruit on the top of the parkin means that it needs to be eaten the same day or the next day. You'll be relieved to find (as was I) that the top of the parkin is already delectably sticky and moist after only a day of waiting. In fact, I would venture to say that it is stickier and moister than either of my previous parkins. Just delicious. And this means that if you want to bake a quick batch of this for Bonfire Night this year, there's still ample time to do so!


This is fabulous - sticky, moist and full of gingery flavour. I would possibly add more ground ginger next time, and more chopped ginger, because really, can there ever be such a thing as too-much-ginger. I don't think so! I loved the ginger in the cake and the sticky top but to be honest the fruit didn't really add anything other than aesthetics (which is important, but not as important as flavour) and a good, chewy textural contrast but I think I'd leave them off next time so that the keeping qualities are improved (and I can keep more of it for myself rather than giving it away - selfish ulterior motive ;-)). Definitely a make again.


Since both apples and pears are in season right now and this makes good use of them, and as the season in a broader sense is calling to me for ginger and spice, I am submitting these to Ren at Fabulicious Food for her Simple and in Season linky, hosted this monthhttp://www.renbehan.com/2012/11/simple-and-in-season-november.html by Ren herself.


I am also submitting them to Bookmarked Recipes hosted by Jac of Tinned Tomatoes, as I first saw these when I was in the depths of revision and even though I knew I didn't have time to make them straightaway I knew without a doubt that they would be on my plate this season and recommend you add them to yours too.


LinkWithin

Related Posts Plugin for WordPress, Blogger...